|
Sidebar
Learning Calibration
Basics
|
 |
|
Image: CHpg
Staff |
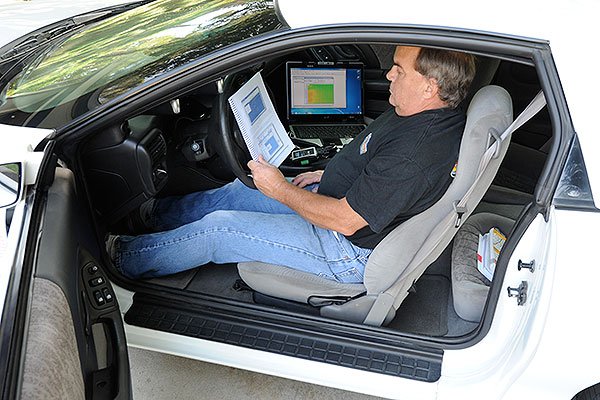
At Tom Henry Racing,
we've been doing custom tunes for years, but what if you
want to try calibration, yourself? Some gearhead
luddites whine, “Cars with computers–can't work on them.
Too complicated. Too expensive. And, tuning? You gotta
be kiddin' me. Only dealers or engineers can do that."
If you understand
what goes on inside your engine and you are
computer-literate enough to create an Excel spreadsheet;
you probably can learn to tune–or “calibrate,” as
engineers say–engine control systems.
|
 |
|
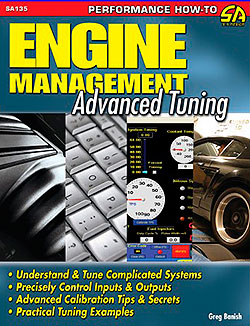
Our initial
education about tuning work came from this book and
several others. Image: CarTech Books. |
|
How can you start
learning to tune? Well–there are several ways. You can
do an "internship" with an experienced tuner–fabulous
idea, but a rare opportunity. You can read Internet
forums–reasonable in theory, but in practice, be
cautious when reading calibration discussions because
there are forum members who know enough to be dangerous
and are quick to bloviate about tuning. Not to say
experienced calibrators aren't on-line–it's just they're
harder to find. You could try to learn by
trial-and-error–bad idea. You can read books, watch DVDs
or take classes. This is probably the way a cost
conscious DIY should learn calibration. |
Good reading on the
subject is Jeff Hartman's, How to Tune and Modify
Automotive Engine Management Systems, published by
Motorbooks. Additionally Greg Banish’s Designing and
Tuning High-Performance Fuel Injection Systems and
Engine Management: Advanced Tuning, published by
CarTech are excellent choices. Finally, Harold Bettes'
and Bill Hancock's Dyno Testing and Tuning and
GM Gen III Powertrain Control Systems by Mike
Noonan, also, from CarTech, are good books.
|
 |
|
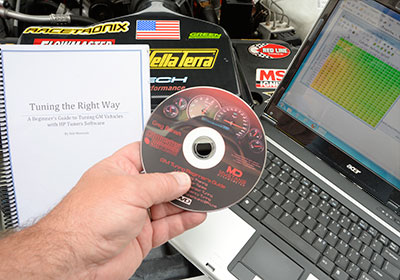
The Tuning School home-study material
(left) and the Calibrated Success
DVD-base classes (center) are both good
ways to learn about tuning, however,
their approaches are different and some
of the course material do not overlap.
As a result, we found both instructional
channels were valuable to us. Image:
CHpg Staff. |
There are home-study
courses. If you like reading, there is A Beginner’s
Guide to Tuning GM Vehicles with HP Tuners Software,
offered by the “Tuning School” of Odessa, Florida. If
you like watching, Greg Banish's Calibrated Success has
two good training DVDs which it sells through Summit
Racing. The first DVD, "GM Tuning Beginner's Guide",
covers basics such as tuning for aftermarket injectors,
MAF Sensors, volumetric efficiency. The Beginner's DVD
focuses use of HPTuners. Calibrated Success also has "GM
Tuning Advanced Guide" which covers tuning for
aftermarket cams, scaling, tuning ECMs with virtual VE
tables and other subjects.
The home-study books
have a few confusing statements and some lax
proofreading. The DVD's videography and editing were
substandard in spots. Nevertheless, the training from
both these courses is beneficial–particularly, the DVDs.
While all this instructional material is focused on V8s,
many techniques apply to calibrating V6es, too.
If you like the
classroom environment, both the Tuning School and
Calibrated Success offer classroom instruction. If you
can afford it, such training is even better. See their
web sites for more information.
All Dyno or Some Dyno
An issue which evokes
strong opinions amongst calibrators is how much work
must be done on a chassis dyno.
Some say the only way
to tune is with a load-bearing chassis dyno and anyone
doing it with road testing is a rank amateur. Others
make a case for only some of the work requiring a
chassis dyno with other tasks done on the test track.
Even the training
material we used seemed to differ on this issue with
Calibrated Success' DVD suggesting a load-bearing dyno
is the only way to get the job done right whereas The
Tuning School courses suggest it's practical to do some
work on the road.
We used a mix of dyno
runs and track testing because the cost of doing it all
on a dyno was prohibitive. We believe our practical
tuning needs were met, but we, also, agree that, to get
a "perfect" engine controls calibration may require a
lot of chassis dyno time.
Oxygen Sensor Basics
|
 |
|
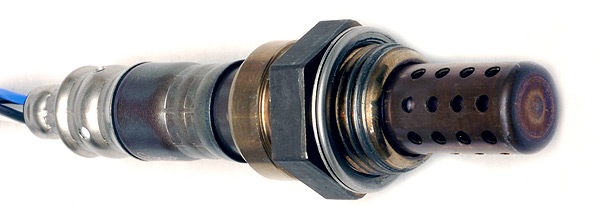
One
of the Denso narrow-band oxygen sensors
we use in the Tom Henry RS. (Image: CHpg
Staff. |
|
 |
|
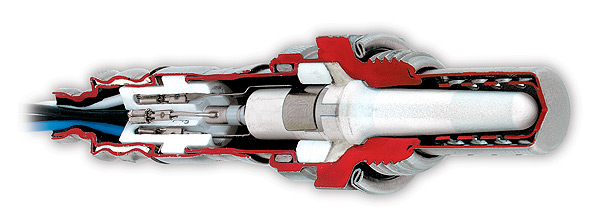
These are the guts of
a Denso oxygen sensor. The white part is the active core
of the sensor. In it is a device known as a "Nernst
cell". Its two electrodes provide an output voltage
corresponding to the quantity of oxygen in the exhaust
relative to that in the atmosphere. Image: Denso
Products and Services America.
|
An oxygen sensor
(O2S) measures the oxygen in exhaust gases. In 1976, the
"lambda" or "exhaust gas oxygen" (EGO) sensor for
automotive use was introduced by the Robert Bosch
Corporation. Most O2Ses are “narrow-band” devices. They
generate 100 to 1000 millivolts, depending on the level
of exhaust oxygen, however, their output is linear only
in the narrow band of voltages generated when combustion
is near stoichiometric. Outside a range of
0.97-1.06-lambda, the signal is nonlinear making useful
measurement when the engine is in PE impossible.
Wideband sensors,
developed by Bosch in the mid-1990s, vary a reference
voltage supplied by a controller. This produces a far
more linear output such that, given a low level of back
pressure, a "wideband" is accurate from 0.34 to 1.51 λ.
A wideband is required for calibrating at
wide-open throttle (WOT).
Learning Lambda
The DVD from
Calibrated Success taught us to think in "lambda," a
measure of free oxygen in the exhaust identified by the
greek letter "λ," rather than air:fuel ratio (AFR).
Combustion is
"stoichiometric" when neither unburnt hydrocarbons
(rich) nor excess oxygen (lean) are present in the
exhaust. When combustion is "stoich," lambda=1 and the
engine produces low exhaust emissions, high catalytic
converter effectiveness and good fuel economy.
Stoichiometric is 1.00 λ regardless of fuel type,
whereas AFR varies. For example: stoich for pump gas is
often said to be 14.68:1, but actually varies
14.55-14.8:1 depending on humidity and the gasoline
blend. "Indolene Clear," an emissions test fuel used by
car companies, is stoich at 14.56:1 and that value
sometimes appears in GM calibrations as a reference.
Oxygenated gasolines containing up to 10% ethanol, (aka
"E10"), are 14.08-14.25:1. Another, E85, which is
popular with racers, is 9.87:1. If you think lambda, at
1.0 λ; they're all burning stoichiometrically.
When an engine is
under high load, its air: fuel ratio must be rich to
prevent excessive combustion temperature and detonation.
Calibrators call this "power enrichment," or "PE" and,
on straight gasoline, it's about 12.5:1, air:fuel. With
E10, it's about 12.2:1 and with E85 it's 8.4:1. If
you're using lambda, in PE, those are all 0.84-.0.86 λ.
Thinking in Lambda
makes calibration easier.
Fuel and all the
Trimmings
When engine controls
operate in "closed loop," they “trim” fuel flow by the
amount necessary to have combustion as close to 1.0 λ as
possible. If the base fuel schedule has the engine
running about 1.0 λ, trim values are mid-scale, usually
designated 128 or 0. If lambda is less than 1.0, the
engine is rich, so the system decreases fuel flow to
bring combustion back to stoichiometric and the trim
numbers will be lower. If lambda >1.0, the engine is
lean, so the system increases fuel flow and the trim
numbers are higher.
There are two kinds
of fuel trim, "short term" (STFT) and "long term"
(LTFT). The first changes quickly and is not retained in
memory. If the ECM detects a trend in STFT, it transfers
that to LTFT, which is retained in memory, such that
STFT varies from zero, less often. The total fuel trim,
short-term plus long-term, is added to the base fuel cal
to keep combustion stoichiometric.
Finally
The instructional
material might take a week or so to digest. After that,
with HPTuners' VCM Editor, you can download a
calibration from your Camaro or Firebird and start
practicing the techniques you learned.
In couple of weeks,
you'll be ready to "flash" the car's computer with your
first calibration. Indeed, you'll have more to learn,
but you'll know the basics.
< Return to Part 6
|